Monday 3 November 2014

Exhausting work.

 The time has come to do something about the exhaust system. I had looked long and hard at a set of extractors available for this particular engine for swapping into late model Nissan Patrols. They exited in around the right spot but still didn't look like they'd quite be right without some work, and $650.00 is a lot of money for maybe then hacking them up!
 So I bought some header flanges and a Summit weld up shorty header kit for small block Chevs and decided to have a go! I bought the SBC kit for several reasons, mainly price ( I knew I would be hacking the pipes up so no need for anything special) and that the kit used 1 5/8" primary tubes, which is all this engine needs and being smaller, are easier to snake around for clearance.
 The header flanges:

And the header kit:


 I also bought a power tool I've been avoiding buying for years, always finding an excuse not to spend the money. Seeing how quickly it cuts through the exhaust tubing, I was a fool for not buying a cut off saw years ago! Such are the joys of being a tight ass!

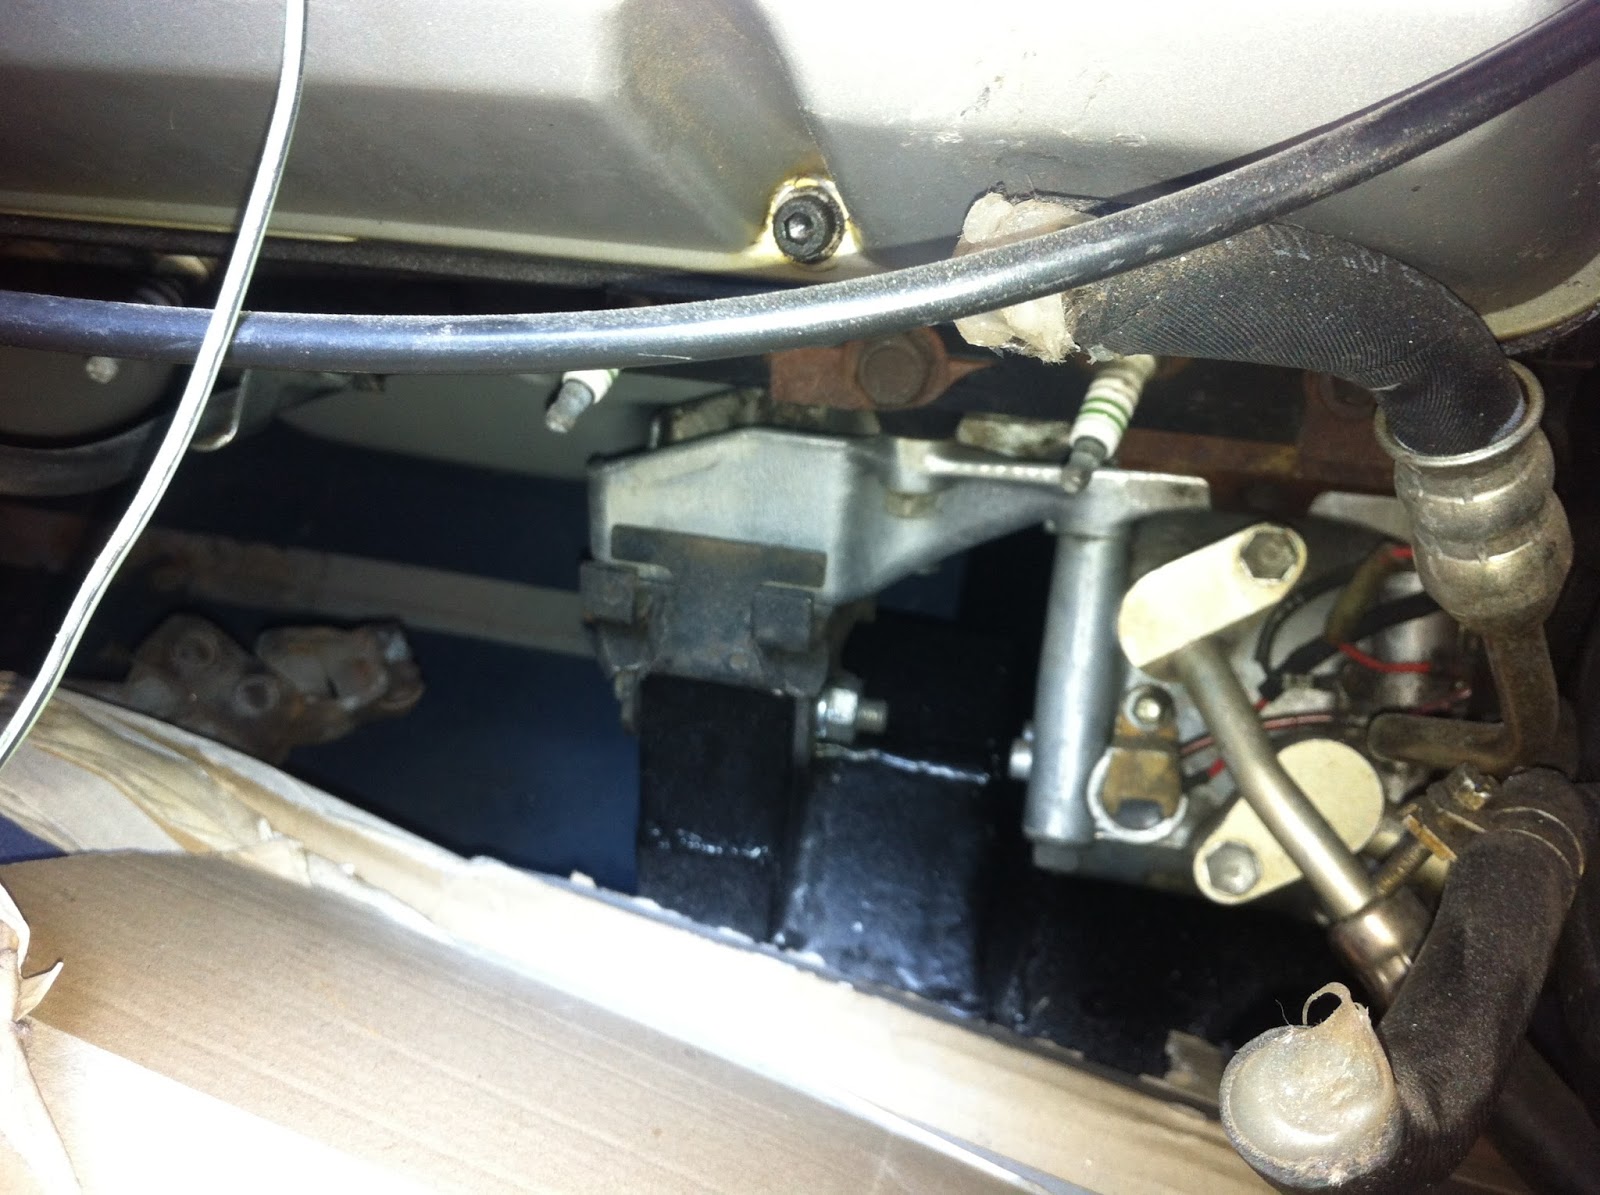
To make a bit more room for the exhaust and to ensure that extra room reduced any heat soak issues for the starter, I also bought a mini starter, which was good for several extra inches of clearance. This is the original starter:

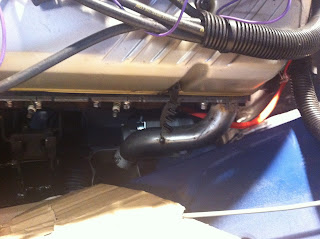
And the mini starter. Not only is it shorter, but much more room between starter and frame:

Then it was on to the interesting part, the actual header construction. I've never built a set of headers before, so I chose to start on the easier side first, the passenger side. There was no steering shaft in the way on this side so it was a fairly straight run down. There's not too much to say about fabricating headers except that I found it easiest to put the collector where I wanted it under the car on a stand and work towards it with the tubes. I found it best to make several cuts to arrive at the correct angle rather than a large first cut as angles can change a lot when you shorten a pipe, especially near the middle or edge of a bend!:


Here is the passenger side collector, I was worried about finishing the inside of the collectors (for fear of exhaust leaks), but it was pretty straightforward:

Here is the header welded up but waiting to have the collector trimmed to size. I wanted to finish weld the headers, then get them mounted and offer up the bend I needed to make the transition under the car. This allowed me to get the right length:

O2 sensor bung welded in:

And the 90 degree bend I had to get right both in height and direction:

Ended up with good ground clearance and enough room for a catalytic converter beside the gearbox, tucked up out of harm's way. Note that I used three bolt flanges, I HATE two bolt flanges! They always bend, leak and are a general pain in the ass!:

 The exhaust is 3" tube coming out of the headers, it will step down to 2.5" into the cats and then down to 2" out of the cats. This will keep the velocity up and create a little bit more heat in the cats, which will help them do their job better. I don't really need to run cats by law, but I want to as I want this car to be totally emissions legal for the engine year being swapped in. Car guys don't have to ruin the planet just because they can!
 These are the cool reducers I got for the exhaust system. They step down a little at a time, just cut them at the diameter you want. They are also cool because the step downs are more like a cone reducer, so much less of a bottle neck in the system. The other advantage is that you can use both parts of the reducer if you are stepping the exhaust system down, eliminating throwing away the other half!:


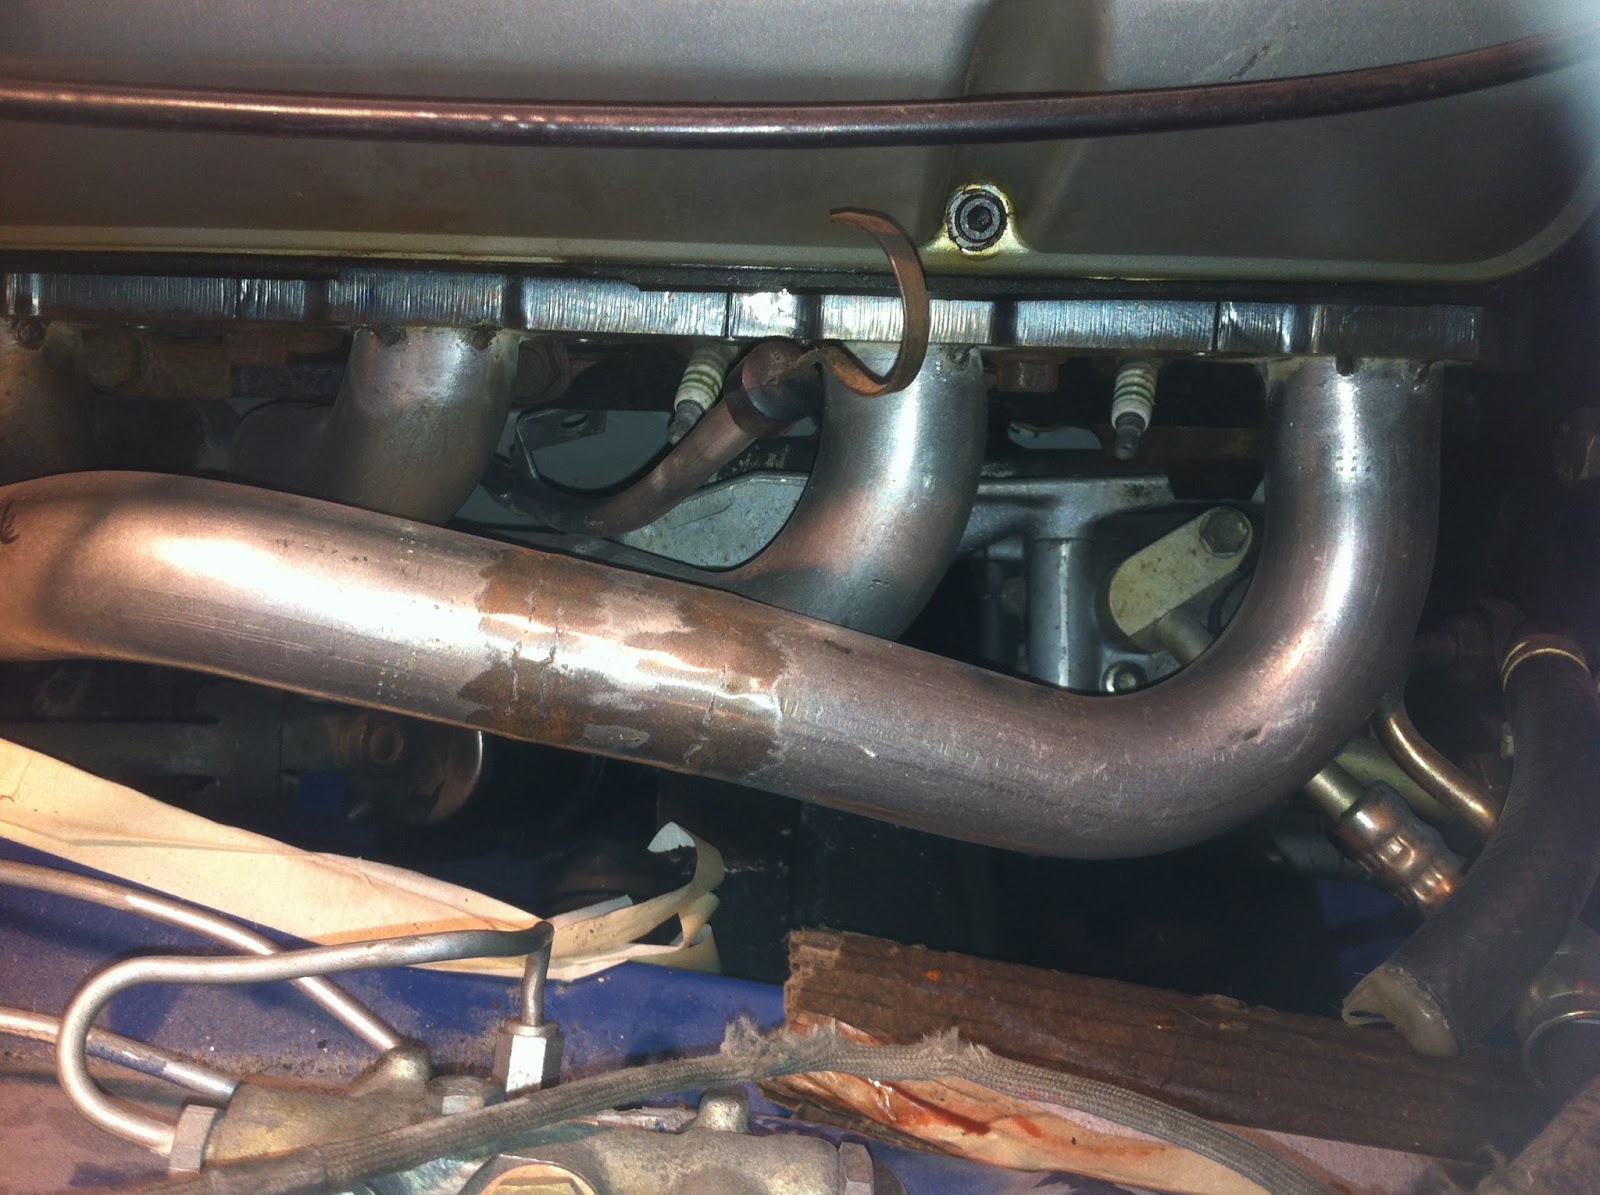
 And here is the beginning of the much trickier driver's side header. It's REALLY tight around the steering shaft, but it's getting there. The engine mount and A/C compressor bracket isn't helping either. Yes, this car will have functioning air conditioning when done.
 The front header pipe will run along the top then duck back down behind the rear pipe.....somehow! No seriously, there is enough room, it'll just take some time to sort out and some right angle spark plug boots:


 Once I have the driver's side done and cats mounted, I can run the exhaust back. Plan is to run 2" pipe past the transmission and maybe use a 2" in/ 2" out open chamber muffler behind the trans, then two large oval mufflers in the normal Jaguar spot under the rear seat.
 From there I'll buy a pair of new over axle/through rear suspension cage pipes and then out to the back of the car. That'll save fabrication those difficult through cage pipes and should allow good flow whilst being relatively quiet. Once the exhaust is routed, I'll sort out the driveshaft, then pull the rear cage down and rebuild the rear suspension and differential.
 More exhaust pics to follow as everything gets done.


Front suspension and crossmembers again!

Well, everything is now completed with the two crossmembers. I'm pretty pleased with how they've worked out. The transmission cross member has plenty of room around it for exhausts, shift cables, future maintenance etc:

 And the engine cross member has as much room around the mounts as I could get for exhaust clearances:


I've also finished the front suspension completely now. New bushes, balljoints, rotors, bearings, caliper rebuild etc. All painted in the tough 2k epoxy so it'll stay looking good for a very long time!
In the photo below, the stub axle is frosty with condensation as I froze them for 48 hours before installation, this ensures a nice, tight fit for the taper the stub axle and hub are connected by:

 And a couple of photos of the finished suspension. I'm a bit worried about the front spring stiffness. When jacking up under a control arm, they barely compress an inch before the body comes off the stands. I'm hoping there is a LOT more weight to go onto the front of the car still!:


Wednesday 4 June 2014

Fabrication time.

 Work on the XJS has progressed, albiet slowly. I've bought another car for daily transportation that needed serious suspension and mechanical work to make it useable, but at least I now have a vehicle that'll tow large trailers easily.
 I've been spending time on the XJS the last few months aligning the engine exactly where it needs to be in the car. This takes some time if done properly to reduce drivetrain vibrations to a minimum and to ensure a long, trouble free life from parts such as universal joints and differential and transmission input/output bearings and seals.
 Setting up the body took a while, ensuring it was level front to rear and side to side:


 Centreline measured out on floor with plumb bobs etc:


The sump on the engine also had to be swapped out for a rear sump out of an earlier model car. I also modified it to use the later model baffles and windage trays, which added a full day's work to the job, but is well worth it considering it is going into a GT car:


 It took a fair while getting the engine in the right spot as the XJS has the large reinforcing buttresses running down the inner guards from the firewall. In a Jaguar sedan, these don't exist, so clearance for exhaust manifolds and cylinder heads is much greater. There were also clearance issues in areas I didn't even think would be an issue. The A/C compressor was hitting the front of the engine mount on the crossmember on driver's side and the bellhousing on the transmission has two small wings cast in that need to go. Otherwise, it's pretty good all round now, with a good, big finger's worth of clearance everywhere it's tight.
 Our engineering guidelines for modified vehicles require a minimum of 10mm clearance from engine to body, so a big finger gives more than enough clearance, and is easy to measure!


In the end, it all fit pretty well. Bonnet clearance is going to be close, but I tink it'll fit. If not, I don't have a problem welding in a nice teardrop shape bump. Very retro and will suit the styling of the car.
 The cast iron manifolds I bought a while back have no chance of working, but  I have found a source for some shorty headers used to fit these engines into Toyota Landcruisers. They will fit exactly as I need them for the XJS by the looks of it and being mild steel, if they need tweaking, it will be easy enough to bend or cut them slightly.
 I have made a transmission crossmember to fit the new drivetrain. I stepped it down in the hopes of having enough clearance for dual exhausts. We'll see how (and if) that works out!:


  The front crossmember has the new mounts tacked into place in the car. I'll slide the crossmember out and weld them up properly very soon, then I'll paint both crossmembers with some super tough epoxy paint I have on order.
 Before I put the engine in, I spent some time unravelling the engine harness. Teasing the wires out, removing the power feed wires that ran across the engine to the other side of the donor car engine bay and labelling all the wires as to where they go and what they do etc.
 As Jaguar thoughtfully put a big bus wire on the firewall, I can easily shorten these power and ground feed cables and mount a nice relay/fuse block up near the washer bottle out of the way. Of course, we all know Jaguar did this only because it was easier to build the car so it could be easily made as a RHD or LHD car on the production line, but it makes life easier for us!


  So the next few steps are getting the crossmembers welded up and painted, then back into the car. Once the front crossmember is in the car, the front suspension will be reconditioned and reassembled. I have the balljoints on order and all the bushes already here, ready to go. All the front suspension will need after that is caliper rebuilds and new front rotors. That will all happen fairly quickly once it starts.

Friday 7 March 2014

On to the dirty bits

The front and rear suspension have been freed from the donor car. It's actually a fair bit rustier than it looks once you look past the bog that's been slathered over rusty frame rails....
Anyway, that car won't be on the road destroying poor unsuspecting people's bank accounts anymore!
 Here are the front and rear ends from the donor car. I'll strip them of all suspension and brake parts to make them easier to handle under the car for mock up, then once I have the engine positioned and mounts fabricated, they'll come out and go off for blasting, then the suspension and brakes will be reconditioned as they are reassembled. As you can see, the car was a previous dodgy V8 swap victim, so I already have some appropriate front springs for the car:

The sub assemblies are in quite good condition. Even all the crossmember attachment bolts are in great, rust free condition and the rear control arm front mounts literally popped off the body mounts once the bolt was undone with just the gentlest of prying, so I think I've been lucky with these assemblies. One rear hub has a fair bit of play, but nothing a new set of bearings won't fix. The Kent wheels are in very good condition as well, one even has the original, or a period fitted Dunlop Aquajet still on it! Looking at this tyre, I know why so many people were afraid of driving in the rain in the 70's!
 I also dragged the engine and transmission out of it's hidey hole for a blast and degrease when I did the crossmembers. They both look in very good condition for their mileage, draining fluids showed both engine and trans had been at the very least serviced somewhat regularly. I had planned on painting at least the engine, but it looks quite reasonable. The rocker covers and intake may get a coat of paint, but that's about it I think:

The factory cast exhaust manifolds look like they may even work as well. I have spent some time untaping the engine wiring harness, the Commodore the engine comes from has a major sub harness running across the front of the engine for power feeds for various relays, ECU power etc. As I will be picking up my power and grounds from the firewall for the ECU, I am bringing most of that wiring back to the left hand firewall area. I will use the stock Jaguar wiring, relays etc for starter, supplying switched power to ECU, ignition module etc, but will use the new ECU to trigger A/C clutch, cooling fans and anything else I may be able to use. I also will be using some of the Jaguar engine harness for various sensor wiring as I plan to carry over the Jaguar coolant gauge sensor at the very least and will splice into the jaguar wiring for warning lights etc.
 I've also whipped up some covers out of quilted cotton for the car. The side covers have 20mm laminated open cell foam below the crease line in the body in pockets to help protect against accidental dings etc when in the garage being worked on. They'll also probably see service when the car is laid up for any length of time in the future. The cowl cover will get used a lot for regular servicing. Once the car is completed, I will cover that with a layer of vinyl so it is resistant to grease and oils.
 The few hours it took to make these covers up is well worth it for the peace of mind they provide me with:


Wednesday 12 February 2014

Painted!

Finally got all my ducks in a row and got the whole shell, front guards and boot painted. The weather was perfect for painting, no wind, not too hot so it all went quite well.
Here are some photos of everything getting ready for the topcoat.
This is the shell waiting after final sanding, the cover helps keep contaminants off the primer while it sits:

You can see the gravel stop on the sills here, I found a nice grey coloured gravel stop, means it's less likely to show up as a shade change when painting as it's similar to the primer:

And my carefully masked up boot lid. It took ages to mask the frame up so I could spray gravel stop on the skin, but the end result was worth it! I used gravel stop on the boot lid for a few reasons, it reduces drumming, reduces condensation formation on the skin and hides a surface that is impossible to get looking great with sanding.
 You can see a spot that is darker than the rest of the gravel stop, I dragged some masking tape across it as I unmasked, I reprofiled it with a piece of foam using a stippling effect, it worked well and saved me a lot of hassle!
Here's the rear of the boot lid painted, gravel stop looks great:

Front of the bootlid ended up fairly peely, I wasn't totally comfortable with where I was when painting it and it ended up a little dry. Never mind, there's four decent coats of solid blue 2k Glasurit there, more than enough to rub back and buff. The whole shell will need a cut and buff anyway:


And the rest came out quite well. only two tiny runs and the usual dirt specks that you get in a garage paint job. It'll look great with a cut back! The guards in particular came out nicely:


 I painted the shell doors on as it seems all the major resto shops have gone over to this method. I was a little concerned about paint coverage around the front of the doors and A pillars, but there was no problem at all. Plenty of room to get the gun in and around there and good coverage.
It allowed me to do a final alignment of the doors and not worry about damaging topcoat and for that alone it was well worth painting this way. I'll definitely be doing it this way on the future!
 I'll leave the paint set up and cure for a week or two, then I'll make up a few covers for the doors and rear quarter panels for when it's being worked on around the garage.
 Then I'll get the parts car off the ground and steal it's front and rear suspension assemblies. They'll get stripped of suspension components and put up under the car so I can work on the engine conversion.
 Once the conversion is done (brackets etc made, driveshaft measured), the suspension members will go out for blasting then I'll epoxy them and refurbish all the suspension/brake/rear end components.
 So it's still a long way to go, but the major, super time consuming part is done at least!