My computer died on me, it was a very slow, convoluted set of failures that meant I lost a LOT of stored data.
It all started innocently enough, I decided to upgrade my hard drive in the tower, it had been getting progressively slower and was out of storage space. I backed everything up to my external drive and thought that would be that. Plugged in new hard drive and it was dead on arrival....then it fried the power supply on the computer!
So, new power supply, replacement hard drive from supplier. Plugged it all in and inadvertently formatted the wrong drive...the external drive!
Anyway, that was my stupidity for the month of December, I have finally transferred and resurrected as many photos as I could from various locations (thankfully, most were on my phone).
I have to admit, it's been very busy over chirstmas and the new year. I have been taking advantage of some long overtime available at work to build up some money (averaging 2-3 12 hour days a week) and that extra income meant I could spend some money hiring an electrician to connect the garage to a real power supply.
This all started when I bought the milling machine and lathe. The garage is far too hot in summer and cold in winter for it to be comfortable (it's a completely uninsulated tin shed), so when the wiring was to be done, I also took the opportunity to insutale and put up some wall lining. It's not complete, but well advanced.The garage was originally only wired into the house's 10 amp GPO supply, not really adequate as the lights in the house would dim when the air compressor fired up! With the new lathe and it's 20 amp (at peak draw) motor, it clearly wouldn't do.
One of the spends we made over christmas was to order a new lounge, recliners and some Ikea furniture for christmas, our first new furniture in 10 years. That was another one of those cascading purchases that set a huge chain of events in motion.
The electricians did quite a bit inside the house for me, replacing downlights, adding in data and extra GPO's etc, as I have also been remodelling the lounge room (major work, large holes to fill from old 70's downlights, wall heaters etc).
Anyway, this blog isn't about my personal life, but the above are the reasons not much has happened to the poor old XJS since my last update.
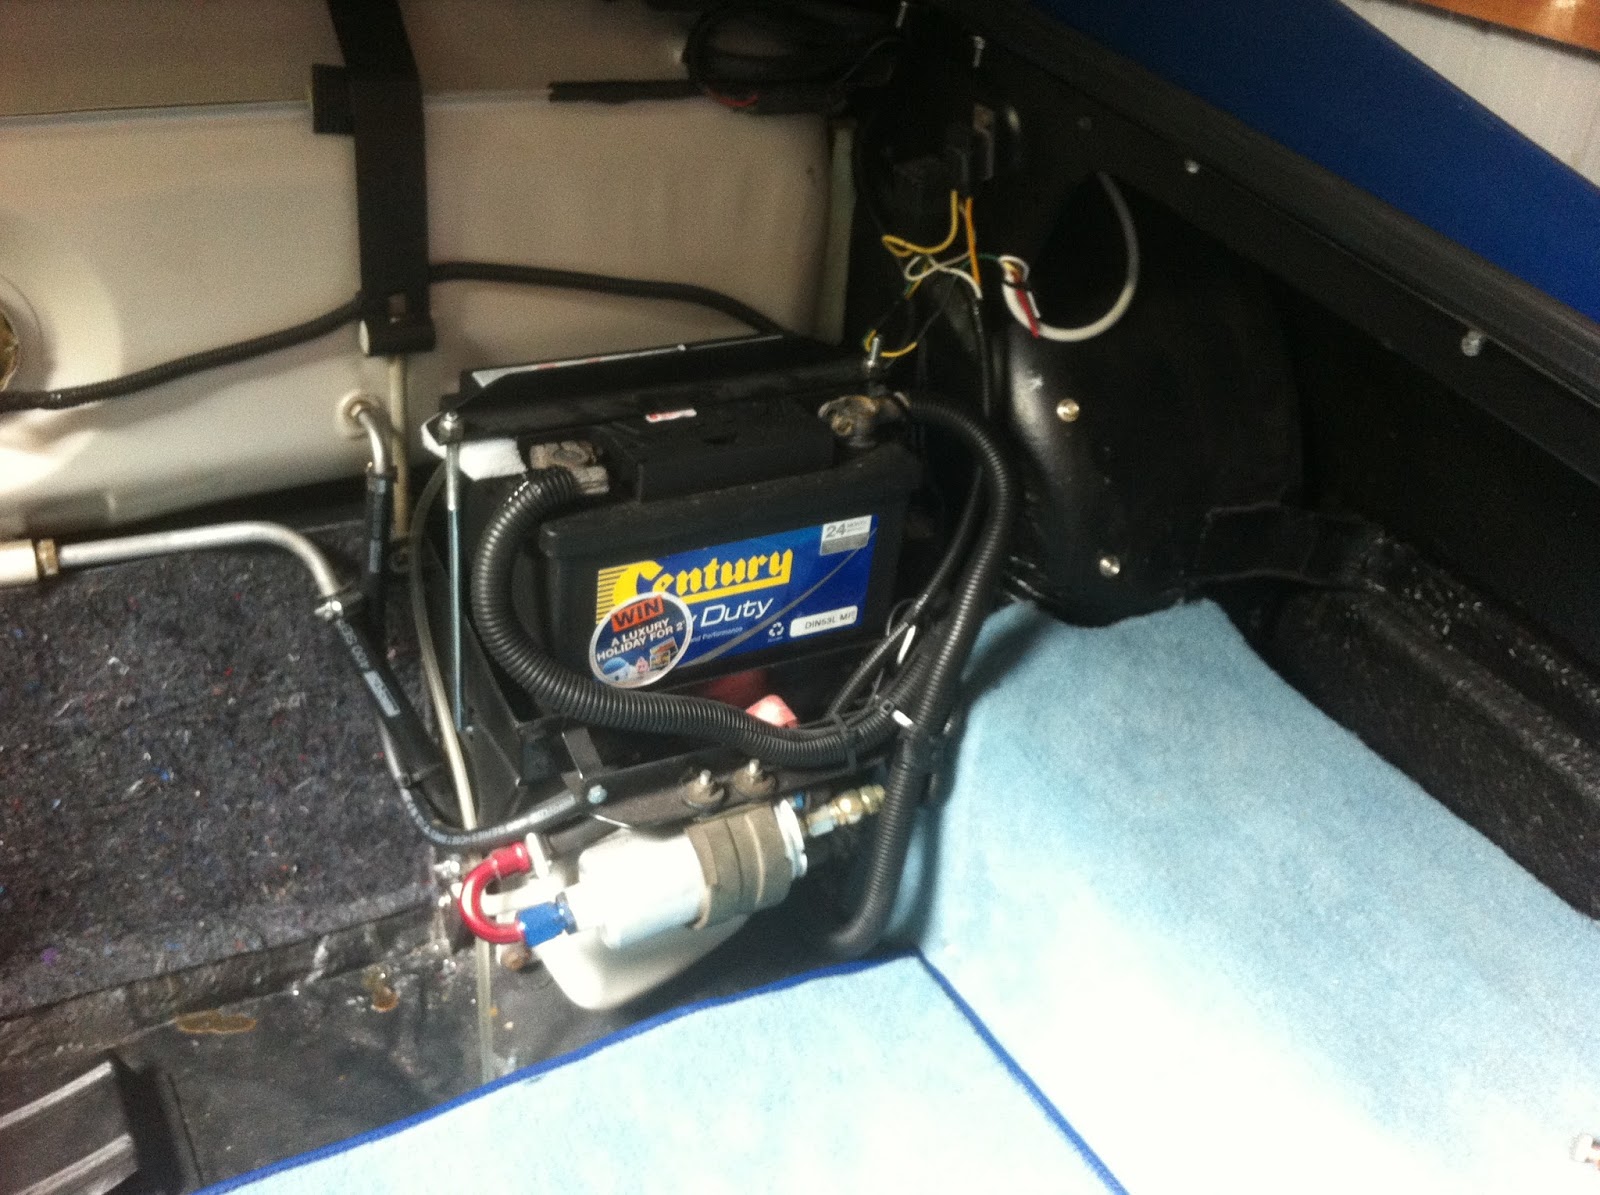
Here are some photos of the garage:
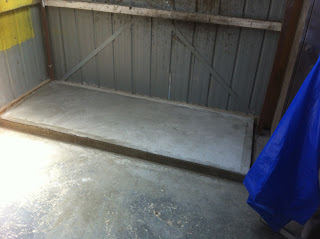


And the lathe on it's new concrete pad (I plan to level the garage floor one day, this makes it easier):

 Still need to make some beefy shelves and pour a pad for the milling machine, but the hard work is done. That lathe weighs just on 1000kg, so it was fun moving it around!
My place of work has also finally made the decision to build a huge new building on a vacant lot they own next door, so that has raised the issue of parking at work. There are a huge amount of employees (we all currently park on the vacant lot) and of course, there will be many construction workers there for 18-24 months. I knew it was coming and have been looking out for cheap motorcycles for commuting. A BMW K1100 came along at the right price (but wrong time!), so I snapped it up. Needs work, Have put a new fuel pump and battery in it, so its running now. Also needs tyres and a few little cosmetic things, but is complete and looks in great condition really:
 On to the Jag.
I had picked the XJS donor carcass clean, there was nothing left of any value on it. I have plenty of spares now and saved a couple of body panels. The decision to cut the shell up and scrap it wasn't taken lightly, but I ran adverts everywhere for several months and no one wanted either the whole shell or panels off it, so don't tell me I have destroyed another car. No one wanted it.
Here are some photos of what an XJS looks like cut up:


I've been busily tidying up some small jobs that I've been putting off.
Finally found a decent interior light, NOS in fact. Had been looking at how to make the old, broken one work, but this one came along:

 And decided that a stock steering wheel just wasn't for me and went with a nice, new period style Momo:

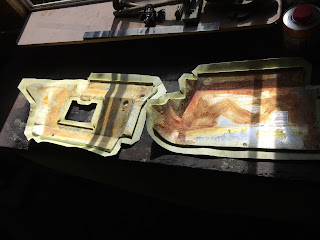
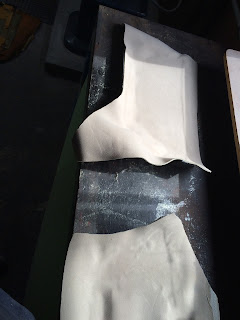
This only left the dash and under scuttle panels to finish the interior. Somehow I had misplaced my driver's side scuttle panel (I may never have had one, as it seems I have three passenger side!), so I got a nice used one of them. Both my one and the replacement driver's side looked OK, but ratty compared to all the new stuff, so the obvious decision was to reupholster:


And having stared and wondered exactly what to do with the old printed circuit for the instrument cluster, I finally found an NOS one and jumped on it.
I had tried repairing the old one, thought about getting rid of it and hard wiring the dash, finding a good used one (they are no better) etc, but this seems the best solution. It eliminates the dash as a source of problems when troubleshooting this 40 year old car with modified engine sensors and wiring.
I am still very seriously considering designing and getting some prices to manufacture some brand new printed circuits, it will depend on whether anyone still has the capabilities to produce circuits with this old technology, and if they do, whether it is cost effective for me to do so. I wouldn't be doing it for free, I would need to make some sort of profit to make it worthwhile.
Here is the NOS printed circuit. I still just stare at it sometimes, it's so new!:


There isn't really that much left to do to the car now, it's just a matter of finding time. The bumpers need to be completely restored and they are rubber bumpers, so I don't quite know where to start with them. I also have to chase around the car and revisit a few small issues, main one being a slightly leaking sump gasket, which is an easy, but time consuming fix and a few other little problems, like finalizing the wirning from engine to dash (which I can now confidently do, knowing the dash is not the issue). Don't think there's much else to do mechanically.
Then I have to cut back and buff all the paint on the car, then fit the remaing brightwork.
It's time to start a final list and think about preparing the car for registration some time later this year.
It all started innocently enough, I decided to upgrade my hard drive in the tower, it had been getting progressively slower and was out of storage space. I backed everything up to my external drive and thought that would be that. Plugged in new hard drive and it was dead on arrival....then it fried the power supply on the computer!
So, new power supply, replacement hard drive from supplier. Plugged it all in and inadvertently formatted the wrong drive...the external drive!
Anyway, that was my stupidity for the month of December, I have finally transferred and resurrected as many photos as I could from various locations (thankfully, most were on my phone).
I have to admit, it's been very busy over chirstmas and the new year. I have been taking advantage of some long overtime available at work to build up some money (averaging 2-3 12 hour days a week) and that extra income meant I could spend some money hiring an electrician to connect the garage to a real power supply.
This all started when I bought the milling machine and lathe. The garage is far too hot in summer and cold in winter for it to be comfortable (it's a completely uninsulated tin shed), so when the wiring was to be done, I also took the opportunity to insutale and put up some wall lining. It's not complete, but well advanced.The garage was originally only wired into the house's 10 amp GPO supply, not really adequate as the lights in the house would dim when the air compressor fired up! With the new lathe and it's 20 amp (at peak draw) motor, it clearly wouldn't do.
One of the spends we made over christmas was to order a new lounge, recliners and some Ikea furniture for christmas, our first new furniture in 10 years. That was another one of those cascading purchases that set a huge chain of events in motion.
The electricians did quite a bit inside the house for me, replacing downlights, adding in data and extra GPO's etc, as I have also been remodelling the lounge room (major work, large holes to fill from old 70's downlights, wall heaters etc).
Anyway, this blog isn't about my personal life, but the above are the reasons not much has happened to the poor old XJS since my last update.
Here are some photos of the garage:


My place of work has also finally made the decision to build a huge new building on a vacant lot they own next door, so that has raised the issue of parking at work. There are a huge amount of employees (we all currently park on the vacant lot) and of course, there will be many construction workers there for 18-24 months. I knew it was coming and have been looking out for cheap motorcycles for commuting. A BMW K1100 came along at the right price (but wrong time!), so I snapped it up. Needs work, Have put a new fuel pump and battery in it, so its running now. Also needs tyres and a few little cosmetic things, but is complete and looks in great condition really:

I had picked the XJS donor carcass clean, there was nothing left of any value on it. I have plenty of spares now and saved a couple of body panels. The decision to cut the shell up and scrap it wasn't taken lightly, but I ran adverts everywhere for several months and no one wanted either the whole shell or panels off it, so don't tell me I have destroyed another car. No one wanted it.
Here are some photos of what an XJS looks like cut up:


I've been busily tidying up some small jobs that I've been putting off.
Finally found a decent interior light, NOS in fact. Had been looking at how to make the old, broken one work, but this one came along:

Also managed to score an NOS gear selector plate:


This only left the dash and under scuttle panels to finish the interior. Somehow I had misplaced my driver's side scuttle panel (I may never have had one, as it seems I have three passenger side!), so I got a nice used one of them. Both my one and the replacement driver's side looked OK, but ratty compared to all the new stuff, so the obvious decision was to reupholster:


And having stared and wondered exactly what to do with the old printed circuit for the instrument cluster, I finally found an NOS one and jumped on it.
I had tried repairing the old one, thought about getting rid of it and hard wiring the dash, finding a good used one (they are no better) etc, but this seems the best solution. It eliminates the dash as a source of problems when troubleshooting this 40 year old car with modified engine sensors and wiring.
I am still very seriously considering designing and getting some prices to manufacture some brand new printed circuits, it will depend on whether anyone still has the capabilities to produce circuits with this old technology, and if they do, whether it is cost effective for me to do so. I wouldn't be doing it for free, I would need to make some sort of profit to make it worthwhile.
Here is the NOS printed circuit. I still just stare at it sometimes, it's so new!:


There isn't really that much left to do to the car now, it's just a matter of finding time. The bumpers need to be completely restored and they are rubber bumpers, so I don't quite know where to start with them. I also have to chase around the car and revisit a few small issues, main one being a slightly leaking sump gasket, which is an easy, but time consuming fix and a few other little problems, like finalizing the wirning from engine to dash (which I can now confidently do, knowing the dash is not the issue). Don't think there's much else to do mechanically.
Then I have to cut back and buff all the paint on the car, then fit the remaing brightwork.
It's time to start a final list and think about preparing the car for registration some time later this year.