Wednesday 4 December 2013

Early summer update

 Things have been busy, and not always with the poor XJS. It's been languishing a fair bit lately due to other things requiring my attention and plain old apathy!
 It's very easy to say "just strip the paint" but anyone who has done it knows how tedious, tiring, noisy, smelly and dirty it is. A very easy job to keep putting off. I've got both sill panels looking great and everything on the shell is now in high fill ready for somfinal sanding. Sill panels are HORRIBLE things to get straight- they're down low and weird angles.

 The big repair on the driver's door is also done and that door is just about ready for some epoxy primer. it's been filled and faired, no photo of that at the moment.
 Both front guards have also been stripped and temporarily bolted to the shell to allow for fitting and some fairing of  some previous repairs and dings. I find it much easier to work on the guards when they are bolted down in position. They are such small, light panels that they move around too easily on stands, benchtops etc. Bolting them up allows you to lean on the sanding blocks properly. Once they are done, they'll be pulled off and epoxied inside and out. I'm quite proud of my plastic sheets masking everything else off! They prevent the guards contacting nice fresh paint, easily allow the fasteners to be pushed through them and keep everything dust free. I came across the idea by accident, I offered the front guard up for a trial fit with the plastics still on and it just looked right.


The boot lid is also stripped inside and out. Chemical stripper on the outside, wire wheel on the inside. Don't use chemical stripper on inside of panels, there is no way to remove it all once it gets behind the subframe.
 This is the first panel I have come across that hasn't been repaired in the past or to have dents.


 When I pulled the bootlid off my donor car, I found this on the original fuel tank. Kind of puts the whole "disgruntled union workforce" story about Brown's Lane into perspective...at least one person on the line was either enjoying their job or building the new Jaguar two door...

 And that's where we are at the moment. I'm off as soon as I post this update to fair and fill both front guards and the passenger side door. Will hopefully have both guards, door and bootlid in epoxy (and hopefully high fill also) before christmas. I haven't started stripping the bonnet yet, it's such a large panel I'm leaving it until I am ready to paint everything else to bring it into the garage and prep it. it just takes up too much space!

Small update today. I managed to get the two front guards and boot lid in epoxy primer. Have thoroughly cleaned and primed inside and out all panels, so I shouldn't have any rust issues with the front guards once they have seam sealer applied to the reinforcement seams.
The boot lid has come up really well, there is a tiny little ding in it that may just block out with primer I think.
 I also ended up with a spare front guard off the parts car and will also have an extra door eventually.

I spent an afternoon pulling engine bay parts out of the parts car.
The brake master, all fluid lines, proportioning valve etc will all get thoroughly cleaned and reconditioned before being installed. This way I'll know how much room everything needs and it won't have to come out again once the engine is in. Nothing looks nicer than nice clean, new master cylinders, boosters, brackets and lines.
Everything on the parts car looks in reasonable condition and looks to have been in service until fairly recently. It all just needs a good clean.

And I received a rear sump HQ pickup for the Holden V8. I picked up a nice used rear sump a while ago so now the engine can be swapped over to rear sump for the conversion. I intend to remove the late model front sump baffling and windage tray from the Commodore sump and fit it to the older sump. Both the sump and pickup I bought are in excellent used condition.


  The engine will get new front and rear main seals while I'm at it as well, plus I'll pop the transmission off, replace the front pump and input/converter seal plus some other light transmission tweaks.
I may as well replace seals etc now whilst it's easy.


Tuesday 6 August 2013

Finally onto some paint.

The weather has sort of warmed up enough that I could get some paint onto a few areas.
First off I laid a couple of coats of polyester filler over the rear end, to fill any imperfections and sanding marks in the filler and sheet metal. This spray filler is great, sands easily and fills all those tiny marks that always make themselves very hard to remove:

I've also managed to spray some epoxy etch primer over the engine bay, cowl and front half of the roof. This is a very nice paint, very tough and flows well. This is the last coat before colour that the engine bay will get, I have no desire to sand the engine bay to a perfect finish, so I'll just scuff the epoxy and straight to colour. This will also give me a nice, thin, super tough paint finish.
 Also spread some seam sealer around all the engine bay seams (unlike Jaguar did originally!)


And then finally decided on a colour and sprayed the engine bay. The colour is Jaguar Azure blue. It was available as a special order 1972-78 and a few E types were painted this colour, but I haven't seen an XJS in it.

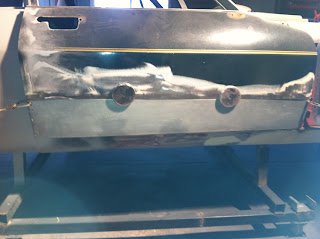
I've been working on the door repair the last few days, shaping the repair patches etc. Slow going but needs to be for such flat panels to avoid significant warpage. The actual door shell was in pretty good condition, just needing the rear corner replaced:


 Then made up an outer skin replacement. This involved folding a flange into the top of a piece of sheet metal for a nice lap joint. Jaguar seems to have coated the inside of the door skin with sound deadener before folding the skin over the door, I had to remove deadener from the rear of the existing skin behind the intrusion bar, to get the repair to lay nice and flat.
 I was lucky in that I also had a nice piece of sheet metal laying around that closely matched the gentle curve of the door skin as a starting point. Was still a fair bit of work getting it to fit nicely though!


You can see a bit of distortion in the front edge of the existing skin in this photo, it could be a real problem when it comes time to weld. I am hoping my temporary jig below will help reduce any chance of distortion by keeping the seam in line and acting as a heat sink for the welding process. I'll just go slow and do a little at a time to avoid excess heat build up.... all I can do really!

I've painted the lower door shell and back of the repair panel with epoxy primer. When it is all completed it will get another coat into the folded seam then seam sealer. That should eliminate any chance of future rust in this area.


Wednesday 10 July 2013

The big sill panel repair and some other progress.

You may remember the big hit this car took on the passenger side front sill. My parts car has a decent sill so I've harvested the front of the sill and the closing panel off it.
I'd previously repaired and fabricated a new piece for the inner sill before replacing the floor panels.
So, we've gone from this:

A bit of pushing:
A bit of bashing:

Repaired the inner sill:


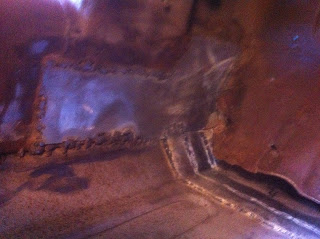
 And cut out the old piece, after carefully measuring and cutting out a piece from the donor car:
Ignore the crumpled piece of inner sill there, it's been plated over from the inside! Also note the massive angled plate that runs down directly from the inside of the outer A pillar and is welded to the outer sill. This was clearly meant to be a jacking point and is probably a carry over from the Mk X with the jack points inside the sills. Based on this, I conclude jacking on the bottom of the sills (on the pinchweld) is quite acceptable for roadside tyre changes. You can easily see the spot welds on the bottom surface of the outer sill holding this reinforcement in place.

 And here is the patch piece welded in from the donor car:

A small rust repair to the front of the sill and it's done.

Also have the fibreglass lower quarter panel extensions bonded in. I used an epoxy adhesive. Will last forever and forgiving of any surface imperfections when bonding. I'm really happy with how the extensions turned out once in place:


I've also pulled the driver's door off the donor car and fitted it so I could fair up the quarter panel to door gap. I knew the rear corner of the door had been repaired before, but I found out the whole bottom of the door had a very poorly done strip repair. It was the old lazy lap the repair over the top and bash it down, then hide with filler repair!
So I'm replacing the lower door skin to get rid of the horrible dents and waves, plus the rust. Best to do it whilst the door is still on the car so everything can be aligned in place:


The good news is that the weather is starting to warm up a little...if I catch a break, I may be able to get the body in epoxy primer in the next couple of weeks. I just have to go over the body and repairs with 240 grit, then spray some polyester filler over the repairs to fill any pinholes. Then epoxy (finally)!


Wednesday 15 May 2013

Aston Martin rear cage and lower swing arm bracing.

For the Jag Lovers forum!
Early XJS rear seatbelt floor mounts and swaybar reinforcing running vertically up behind the rear seats:

 Aston Martin XJS/ DB7 rear control arm bracing:

 Aston Martin rear cage bracing:

Friday 10 May 2013

Turning a corner

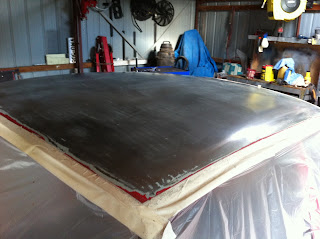
 I stripped most of the paint off the shell over the last few weeks. Roof and quarter panels were chemically stripped.


  I've also stripped the inner guards and frame rails, as the previous respray in the engine bay was merely topcoat over original paint and not the best of prep work, there was a lot of loose, flaking paint and poor adhesion. I really like shiny, clean inner guards and engine bays, so it was an obvious choice for me and well worth the work. Stripping engine bay paint is slow, tedious work...the shapes and small areas make it hard to get a good process going.

 Also note that I've filled the buttress panels from firewall to chassis rails. The original V12 heat shields had held water on this area and destroyed the paint coating, causing heavy surface rust and pitting.A good clean up with a wire wheel and a skim of filler has made them look great. The top flat panels aren't really structural, they merely serve to fill the gap between inner guards and the stamped diagonal brace that runs along their inner edges from frame rail to firewall. They probably have some very minor bracing effect for this brace, but it wouldn't be much.

 All the welding and rust repairs are now done on the shell, so it's fill and fair time.
 Anyone who has done this job knows how slow and tedious it is, filling, sanding, filling some more. Every area of filler gets several thin applications, slowly building the low areas and sanding down any excess. It's fair to say half the filler or more ends up on the floor as dust, but that's how you get a truly smooth profile.
 I was under no illusion that the car would need filler, I knew it had been given a new driver's side quarter panel at some stage and the passenger side rear quarter was a bit wobbly. Even so, there is not a huge depth of filler on the car, just a thin skim over most of it.
There is still a little left to do on the lower front quarters behind the door in this photo. Once all the areas are fair (which will need the doors rehung to get really nicely blended), the filled areas will be sanded with 120 grit, then a final, thin skim coat of filler will be applied to all filled areas to fill any pinholes. Then the car will be power sanded with 240 grit and epoxy primer/filled.
  I like to apply a coat or two of filler, sand them back and let them sit for a week to outgas and properly cure before skinning on more coats, I think this step with every consecutive stage of the bodywork process helps adhesion between the layers and drastically reduces any future tendencies to shrinkage in either filler or primer coats.
 A quick word on fillers compared to lead wiping of body shells. The factory always used lead for two reasons: it was fast and easy to apply and easy to work in a hurry. It was used purely for these two reasons, not because it's better. Modern fillers are far, far superior and enthusiasts don't have the time constraints the factory had to get body shells down the production line in a certain period.
 With lead, the factory could have one or two guys on the line filling the A and C pillar butts where they met the roof, then another guy or two could body file the lead down. No sanding, no dust, a quick and easy two step process that didn't need anything special out of the primers, just a quick undercoat then on to colour.
 I had some good luck last week, a donor XJS came up for sale close enough to me to make it worthwhile buying, and the price was too good to pass up. The shell is fairly rusty and has been a victim of a previous fairly average V8 swap, so I'm not too upset about stripping it. It also has everything I need to finish my car.
 It was a fun trip to pick the car up. I only really had my Maxima available to do the job. Some calculations concluded an XJS without engine or transmission and fluids should be around 1200kgs and a trailer around 750kgs. So with the trailer only double the limit recommended by Nissan, off I went!
 But seriously, I knew the whole trip would be highway driving and was prepared to cruise back at 80 km/h. I found that the Maxima would maintain 100 km/h on the flat easily enough and the suspension, handling and braking were acceptable with the trailer correctly loaded. No, I wouldn't do it regularly, but as a one off it was acceptable!


 As you can see, the donor, apart from an ugly bonnet scoop and the V8 swap, is very original, even down to a pretty decent set of Kents. I think it's also a very early body shell, I haven't looked closely at the numbers, but it's in the low four digits.

 I've yet to have a look under the donor car for the rear end ratio. If it's a 3.31 or higher (and there's a good chance it is), I'll be able to sell off the rear end I bought not so long back. I can also pick and choose which interior bits I want to keep and sell off (remember I bought most of an interior earlier in the year).
 This will help the bank balance!

Sunday 31 March 2013

Body building

With the car right way up, things have been progressing fairly well.
I tidied up the insides of the floorpans, primed, seam sealed and sprayed them with gravel stop. Once the inside of the shell gets a couple of coats of urethane in body colour, those floors will be bulletproof! The metal work in the interior of the cabin is done now, so once I spray inside pillars, floors and roof, it'll be masked off till I complete all the exterior bodywork, just to make cleanup of all the dust from paint removal etc much easier.


I've also cut the lower quarter panel extensions off, the LH side was very rusty, RH side had been replaced before at some stage (with a genuine Jaguar panel). My conclusion on seeing both these panels is the factory did a very poor job of ensuring no rust in this area. None of the seams were sealed, either inside or out. So water, whether from inside or outside, could wick into the seams. If your car isn't rusty there right now, spray as much anti corrosive treatment of your choice as you can into this area as frequently as you can.

 Not only does this area get moisture from the rear tyres flicking up water, but if your fuel filler, rear window or side windows leak, the water will work it's way down the inner wheel arches into this area. Also, those lovely big sail panels will form condensation and it will run down the panels into the lowest point.
 Jaguar should've also provided a drain at the lowest point, which is the front intersection of inner, outer lower quarterpanels and the wheelarch extension. Go ahead and drill a decent hole here on your cars.

This is the lower quarter removed and some primer splashed on. Note my heat shrinking of a dent above the seam line. These lower quarters aren't too hard to remove, I didn't drill the spotwelds, I cleaned all paint off the seams ( so I could see the welds) then ground down the spotwelds from the old lower panel side. This meant I kept the surrounding panels intact with no holes in the seams. I have a pair of fibreglass lower quarters that I will epoxy on, they are non structural panels and originals are expensive and hard to find. It also allows you to keep the front bumper extension brackets intact on the inside of the panels this way, keeping this point nice and strong for the replacement panel.
And this is a view up and inside the cavernous XJS quarter panels, looking up into the buttresses. Most of you will never see this! I am leaving the lower quarters off so I can thoroughly paint up into this area, especially so I can get paint and anticorrosives into the inner buttress/boot gutter seam and around the wheelwells and fuel filler. I'll also put a coat of acrylic stone guard on the panel to reduce drumming and condensation.

And here is where my bodywork is up to at the moment.


 I have repaired a rusty corner above the tail lights and filled the antenna hole. A great way to let water into a car is with an antenna, plus modern powered antennas do a better job and can be hidden inside the car.
I still have to repair the lower part of this tail light housing and a couple of smaller repairs (front of sill, lower boot gutter and a small coin size hole behind door), then I can start stripping paint and re fairing the body.


Notice the nice small heat affected zone, whoever says flux core MIG welding is no good for bodywork doesn't know how to weld, and this was me also doing deliberately hot welds to ensure strength.
 Ground up and awaiting some final dollying then filler.