So I've been "between" full time work for a few months, so XJS work pretty much stopped in an effort to conserve money.
However, in that time I started making up patch panels for the few major rust repair areas that the new floor pans didn't eradicate. mainly rear parcel shelf, floor under rear seat and the rear seat bulkhead. There are a few other small rust repairs remaining, but they are small coin sized repairs that won't take much effort at all.
The process I developed for shaping the rust repair panels was largely borrowed from my time as a marine trimmer/sailmaker. I made patterns up out of paper and simply transferred the paper onto sheet steel. The paper allows you to quickly and accurately form the template in situ, ensuring the paper lays flat, and is quick and easy to trim to fit well in position as well.
Then I used a cheap craft glue to tack down the templates onto my sheet metal and cut them all out with a combination of a 100mm grinder with fine cutting disc and tin snips. The grinder is perfect for doing long, straight cuts.
Once the panels are cut out, any flanges needed are bent in on the vise and then a trial fit is done to do any further fine shaping. I haven't welded the panels in yet, but they will be offered in place, marked and the rusted panels behind trimmed out before welding into place.
Here's how I laid out the repair templates. You can see the advantages of this method; it allows efficient use of the materials and allows you to set up and cut multiple panels at the same time, a real time saver. No one said home car restoration had to be slow and painful, lack of specialised tools merely means thinking harder before starting something!

This is the rear seat vertical bulkhead patch trial fitted. The floorpan welds need grinding smooth for a nice flush fit, but very close. The paper template allows very close fitting straight off the template, only very minor trimming required in corners for a great fit:

This is the floor below the rear seat, where it rusted out due to rear window leakage. The vertical bulkhead will be cut back for the patch panel before this panel is cut back and welded in, then the vertical bulkhead patch panel welded in. This way, I get brand new floor welded to brand new vertical bulkhead, very strong and an easy fit:

The other side isn't nearly as bad, a much smaller rectangular patch is all that is needed to the floor and the vertical bulkhead has not been affected by rust.
Only a small strip is needed for where the bulkhead meets the floor:
Also the passenger side seat box needed a patch:

I also have the panels cut for the parcel tray but don't seem to have photos of that.
Once the patch panels are welded in, they will be wire brushed to remove the adhesive and paper, then I'll flip the car on it's side and finish weld the floors and rust repair patches from underneath. Then I can do any other underfloor work as needed (, prime and seam sealer to new weld seams, repair existing failing sealer), and chip back any bad bitumen coating, reprime/seal and replace coating.
By having the dolly frame I made wider than the car, I can strap the shell down to the frame and lift one side with my engine hoist, the frame simply pivots on the floor. This will make work on the floors easy and when time comes to fit fluid lines etc, will also make that job simple. Rotisseries are a trendy fad, totally overpriced and unnecessary! Just think about the problem and devise the simplest solution.
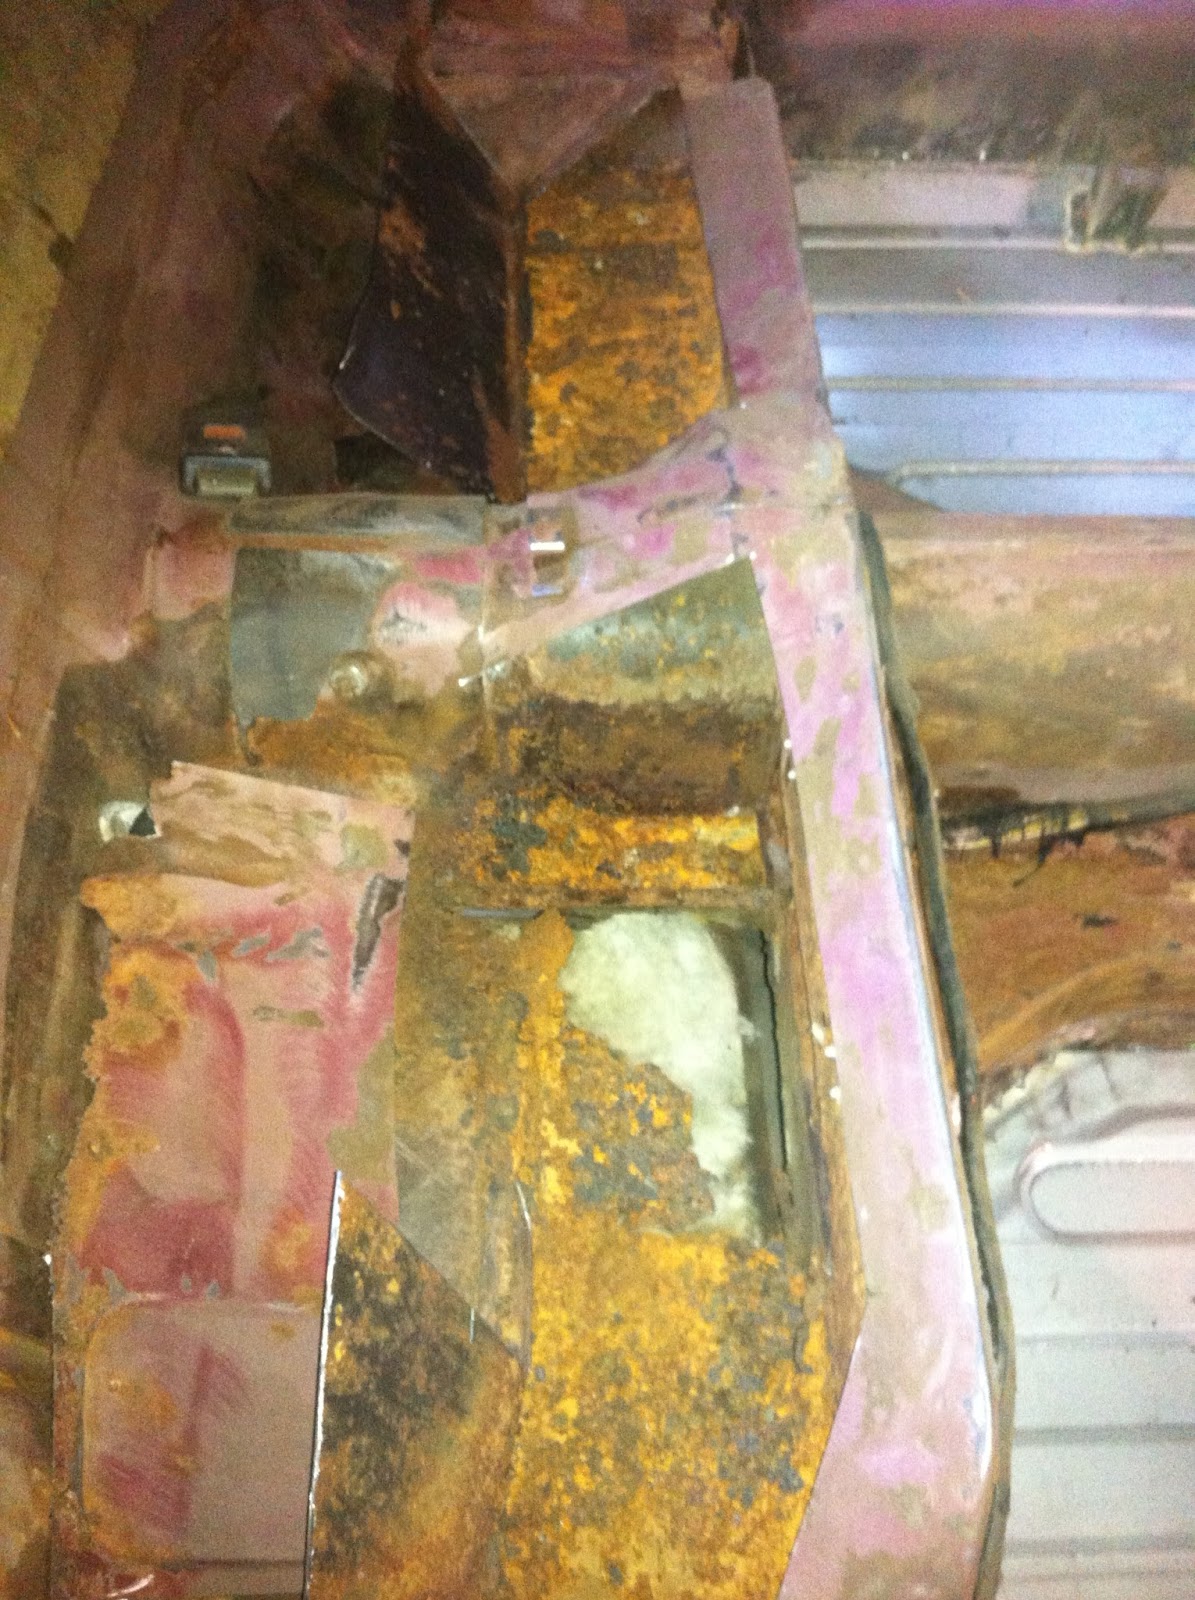
Got stuck into the car today and cut out the rusted parts plus cleaned up the metal around them for welding. Looks pretty scary, but it is all under control. This is looking down through where the back seat should be, you can see the ground and the large soundproofing/heat pad under the floor. Once I have welded the panels from above, the car will be tilted on it's side, the soundproofing will be removed and the underside finish welded, painted etc. Not sure if I will try and reuse the soundproofing pad or use the modern self adhesive bitumen/aluminium pads:

I've finally gotten some decent work done. Bought some more welding wire (which is far better than the junk CIG sells in it's retail packs. Way less spatter and much easier slag removal), and replaced the microswitch in the handle of my MIG welder. It was not making contact all the time and causing bad welds.
Anyway, I have the floors under the rear seats welded up and the bulkheads in front of that:

I've brushed some red primer over the repair, not that it really matters, I'll be turning the car on it's side and welding the patch from underneath as well, which will burn some paint off. Plus the top piece will be welded over it and seam sealed properly, so the floor will never see water ever again.
Front seat bulkhead came out well with the new floor patch welded into the back of it.
And I've welded the two corner patches into the parcel tray. Welded top and bottom. Probably stronger than the original panel, but the parcel tray carries the boot hinge loads and the two child restraint anchorage points, so I don't mind it being a bit overbuilt. I found it surprising that a car built in 1977 had child restraint anchorage points, but there they are. Correct thread and position. They are the steel standoff towers that the parcel tray fasteners push in to, so if you ever need to fit child points to your XJS it's easy.:

However, in that time I started making up patch panels for the few major rust repair areas that the new floor pans didn't eradicate. mainly rear parcel shelf, floor under rear seat and the rear seat bulkhead. There are a few other small rust repairs remaining, but they are small coin sized repairs that won't take much effort at all.
The process I developed for shaping the rust repair panels was largely borrowed from my time as a marine trimmer/sailmaker. I made patterns up out of paper and simply transferred the paper onto sheet steel. The paper allows you to quickly and accurately form the template in situ, ensuring the paper lays flat, and is quick and easy to trim to fit well in position as well.
Then I used a cheap craft glue to tack down the templates onto my sheet metal and cut them all out with a combination of a 100mm grinder with fine cutting disc and tin snips. The grinder is perfect for doing long, straight cuts.
Once the panels are cut out, any flanges needed are bent in on the vise and then a trial fit is done to do any further fine shaping. I haven't welded the panels in yet, but they will be offered in place, marked and the rusted panels behind trimmed out before welding into place.
Here's how I laid out the repair templates. You can see the advantages of this method; it allows efficient use of the materials and allows you to set up and cut multiple panels at the same time, a real time saver. No one said home car restoration had to be slow and painful, lack of specialised tools merely means thinking harder before starting something!


Only a small strip is needed for where the bulkhead meets the floor:
Also the passenger side seat box needed a patch:

Once the patch panels are welded in, they will be wire brushed to remove the adhesive and paper, then I'll flip the car on it's side and finish weld the floors and rust repair patches from underneath. Then I can do any other underfloor work as needed (, prime and seam sealer to new weld seams, repair existing failing sealer), and chip back any bad bitumen coating, reprime/seal and replace coating.
By having the dolly frame I made wider than the car, I can strap the shell down to the frame and lift one side with my engine hoist, the frame simply pivots on the floor. This will make work on the floors easy and when time comes to fit fluid lines etc, will also make that job simple. Rotisseries are a trendy fad, totally overpriced and unnecessary! Just think about the problem and devise the simplest solution.
Got stuck into the car today and cut out the rusted parts plus cleaned up the metal around them for welding. Looks pretty scary, but it is all under control. This is looking down through where the back seat should be, you can see the ground and the large soundproofing/heat pad under the floor. Once I have welded the panels from above, the car will be tilted on it's side, the soundproofing will be removed and the underside finish welded, painted etc. Not sure if I will try and reuse the soundproofing pad or use the modern self adhesive bitumen/aluminium pads:
Anyway, I have the floors under the rear seats welded up and the bulkheads in front of that:

Front seat bulkhead came out well with the new floor patch welded into the back of it.
