Monday, 3 November 2014

Front suspension and crossmembers again!

Well, everything is now completed with the two crossmembers. I'm pretty pleased with how they've worked out. The transmission cross member has plenty of room around it for exhausts, shift cables, future maintenance etc:

 And the engine cross member has as much room around the mounts as I could get for exhaust clearances:


I've also finished the front suspension completely now. New bushes, balljoints, rotors, bearings, caliper rebuild etc. All painted in the tough 2k epoxy so it'll stay looking good for a very long time!
In the photo below, the stub axle is frosty with condensation as I froze them for 48 hours before installation, this ensures a nice, tight fit for the taper the stub axle and hub are connected by:

 And a couple of photos of the finished suspension. I'm a bit worried about the front spring stiffness. When jacking up under a control arm, they barely compress an inch before the body comes off the stands. I'm hoping there is a LOT more weight to go onto the front of the car still!:


Wednesday, 4 June 2014

Fabrication time.

 Work on the XJS has progressed, albiet slowly. I've bought another car for daily transportation that needed serious suspension and mechanical work to make it useable, but at least I now have a vehicle that'll tow large trailers easily.
 I've been spending time on the XJS the last few months aligning the engine exactly where it needs to be in the car. This takes some time if done properly to reduce drivetrain vibrations to a minimum and to ensure a long, trouble free life from parts such as universal joints and differential and transmission input/output bearings and seals.
 Setting up the body took a while, ensuring it was level front to rear and side to side:


 Centreline measured out on floor with plumb bobs etc:


The sump on the engine also had to be swapped out for a rear sump out of an earlier model car. I also modified it to use the later model baffles and windage trays, which added a full day's work to the job, but is well worth it considering it is going into a GT car:


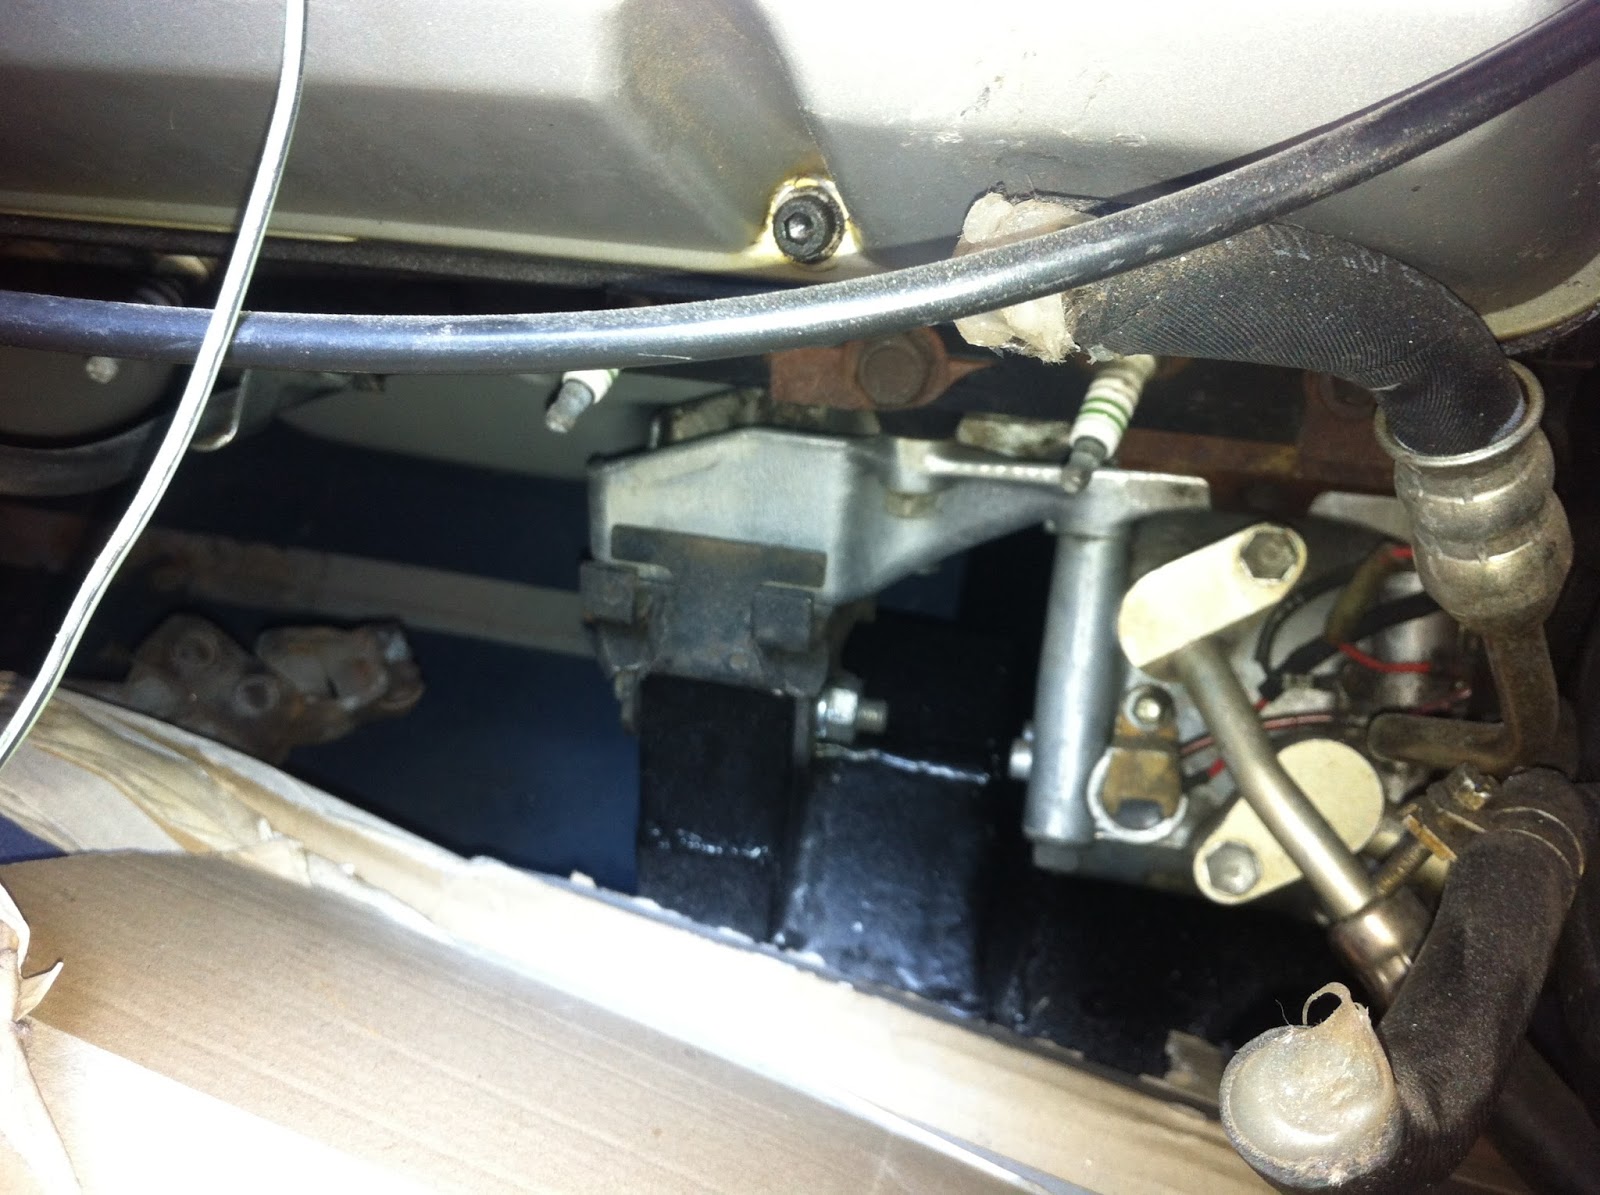
 It took a fair while getting the engine in the right spot as the XJS has the large reinforcing buttresses running down the inner guards from the firewall. In a Jaguar sedan, these don't exist, so clearance for exhaust manifolds and cylinder heads is much greater. There were also clearance issues in areas I didn't even think would be an issue. The A/C compressor was hitting the front of the engine mount on the crossmember on driver's side and the bellhousing on the transmission has two small wings cast in that need to go. Otherwise, it's pretty good all round now, with a good, big finger's worth of clearance everywhere it's tight.
 Our engineering guidelines for modified vehicles require a minimum of 10mm clearance from engine to body, so a big finger gives more than enough clearance, and is easy to measure!


In the end, it all fit pretty well. Bonnet clearance is going to be close, but I tink it'll fit. If not, I don't have a problem welding in a nice teardrop shape bump. Very retro and will suit the styling of the car.
 The cast iron manifolds I bought a while back have no chance of working, but  I have found a source for some shorty headers used to fit these engines into Toyota Landcruisers. They will fit exactly as I need them for the XJS by the looks of it and being mild steel, if they need tweaking, it will be easy enough to bend or cut them slightly.
 I have made a transmission crossmember to fit the new drivetrain. I stepped it down in the hopes of having enough clearance for dual exhausts. We'll see how (and if) that works out!:


  The front crossmember has the new mounts tacked into place in the car. I'll slide the crossmember out and weld them up properly very soon, then I'll paint both crossmembers with some super tough epoxy paint I have on order.
 Before I put the engine in, I spent some time unravelling the engine harness. Teasing the wires out, removing the power feed wires that ran across the engine to the other side of the donor car engine bay and labelling all the wires as to where they go and what they do etc.
 As Jaguar thoughtfully put a big bus wire on the firewall, I can easily shorten these power and ground feed cables and mount a nice relay/fuse block up near the washer bottle out of the way. Of course, we all know Jaguar did this only because it was easier to build the car so it could be easily made as a RHD or LHD car on the production line, but it makes life easier for us!


  So the next few steps are getting the crossmembers welded up and painted, then back into the car. Once the front crossmember is in the car, the front suspension will be reconditioned and reassembled. I have the balljoints on order and all the bushes already here, ready to go. All the front suspension will need after that is caliper rebuilds and new front rotors. That will all happen fairly quickly once it starts.

Friday, 7 March 2014

On to the dirty bits

The front and rear suspension have been freed from the donor car. It's actually a fair bit rustier than it looks once you look past the bog that's been slathered over rusty frame rails....
Anyway, that car won't be on the road destroying poor unsuspecting people's bank accounts anymore!
 Here are the front and rear ends from the donor car. I'll strip them of all suspension and brake parts to make them easier to handle under the car for mock up, then once I have the engine positioned and mounts fabricated, they'll come out and go off for blasting, then the suspension and brakes will be reconditioned as they are reassembled. As you can see, the car was a previous dodgy V8 swap victim, so I already have some appropriate front springs for the car:

The sub assemblies are in quite good condition. Even all the crossmember attachment bolts are in great, rust free condition and the rear control arm front mounts literally popped off the body mounts once the bolt was undone with just the gentlest of prying, so I think I've been lucky with these assemblies. One rear hub has a fair bit of play, but nothing a new set of bearings won't fix. The Kent wheels are in very good condition as well, one even has the original, or a period fitted Dunlop Aquajet still on it! Looking at this tyre, I know why so many people were afraid of driving in the rain in the 70's!
 I also dragged the engine and transmission out of it's hidey hole for a blast and degrease when I did the crossmembers. They both look in very good condition for their mileage, draining fluids showed both engine and trans had been at the very least serviced somewhat regularly. I had planned on painting at least the engine, but it looks quite reasonable. The rocker covers and intake may get a coat of paint, but that's about it I think:

The factory cast exhaust manifolds look like they may even work as well. I have spent some time untaping the engine wiring harness, the Commodore the engine comes from has a major sub harness running across the front of the engine for power feeds for various relays, ECU power etc. As I will be picking up my power and grounds from the firewall for the ECU, I am bringing most of that wiring back to the left hand firewall area. I will use the stock Jaguar wiring, relays etc for starter, supplying switched power to ECU, ignition module etc, but will use the new ECU to trigger A/C clutch, cooling fans and anything else I may be able to use. I also will be using some of the Jaguar engine harness for various sensor wiring as I plan to carry over the Jaguar coolant gauge sensor at the very least and will splice into the jaguar wiring for warning lights etc.
 I've also whipped up some covers out of quilted cotton for the car. The side covers have 20mm laminated open cell foam below the crease line in the body in pockets to help protect against accidental dings etc when in the garage being worked on. They'll also probably see service when the car is laid up for any length of time in the future. The cowl cover will get used a lot for regular servicing. Once the car is completed, I will cover that with a layer of vinyl so it is resistant to grease and oils.
 The few hours it took to make these covers up is well worth it for the peace of mind they provide me with:


Wednesday, 12 February 2014

Painted!

Finally got all my ducks in a row and got the whole shell, front guards and boot painted. The weather was perfect for painting, no wind, not too hot so it all went quite well.
Here are some photos of everything getting ready for the topcoat.
This is the shell waiting after final sanding, the cover helps keep contaminants off the primer while it sits:

You can see the gravel stop on the sills here, I found a nice grey coloured gravel stop, means it's less likely to show up as a shade change when painting as it's similar to the primer:

And my carefully masked up boot lid. It took ages to mask the frame up so I could spray gravel stop on the skin, but the end result was worth it! I used gravel stop on the boot lid for a few reasons, it reduces drumming, reduces condensation formation on the skin and hides a surface that is impossible to get looking great with sanding.
 You can see a spot that is darker than the rest of the gravel stop, I dragged some masking tape across it as I unmasked, I reprofiled it with a piece of foam using a stippling effect, it worked well and saved me a lot of hassle!
Here's the rear of the boot lid painted, gravel stop looks great:

Front of the bootlid ended up fairly peely, I wasn't totally comfortable with where I was when painting it and it ended up a little dry. Never mind, there's four decent coats of solid blue 2k Glasurit there, more than enough to rub back and buff. The whole shell will need a cut and buff anyway:


And the rest came out quite well. only two tiny runs and the usual dirt specks that you get in a garage paint job. It'll look great with a cut back! The guards in particular came out nicely:


 I painted the shell doors on as it seems all the major resto shops have gone over to this method. I was a little concerned about paint coverage around the front of the doors and A pillars, but there was no problem at all. Plenty of room to get the gun in and around there and good coverage.
It allowed me to do a final alignment of the doors and not worry about damaging topcoat and for that alone it was well worth painting this way. I'll definitely be doing it this way on the future!
 I'll leave the paint set up and cure for a week or two, then I'll make up a few covers for the doors and rear quarter panels for when it's being worked on around the garage.
 Then I'll get the parts car off the ground and steal it's front and rear suspension assemblies. They'll get stripped of suspension components and put up under the car so I can work on the engine conversion.
 Once the conversion is done (brackets etc made, driveshaft measured), the suspension members will go out for blasting then I'll epoxy them and refurbish all the suspension/brake/rear end components.
 So it's still a long way to go, but the major, super time consuming part is done at least!


Sunday, 12 January 2014

New year, new push.

Things have been happening on the XJS the last few weeks. I think it's the warmer weather combined with breaking the back of the heavy body work on the car.
 The doors are now epoxy primed inside and out. This only leaves the bonnet and lower front valance panels to go. All of those panels will wait until closer to final assembly. The bonnet because it's so large and I don't want it getting damaged when it's in primer almost ready to go, plus I may or may not need to modify it a little for engine clearance. The valance panels can wait because they're unimportant right now and they don't butt up to any other panels without a break, so colour match isn't critical.
The doors all primed:


And I put some pinchweld along the bottom edges after they were primed to protect the edges while they sat around:

 All the bolt on panels will get scuffed down and hi filled in the next week or two (there are a few tiny dings that have become obvious after putting on the fairly glossy epoxy primer that need reworking), then I can wet sand everything back and start thinking about putting some colour on everything!
 I've also rebuilt the master cylinder and painted the engine bay hard lines to make them look a bit nicer again. They still have plenty of zinc left on them but were a dull grey and mottled. I like to paint lines in an aluminium coloured paint, the aluminium in the paint weathers just as the lines would and look about as natural as painted lines can.
 The brake booster/pedal bracket also got a proper wire wheeling, epoxy primed and aluminium paint as well. No more corroded, pitted white bracket for this Jaguar ever again! I also lucked out and found a recently reconditioned brake booster in my stash of parts I'd been collecting over the years. So the brakes at this end are all brand new now.
 I took the opportunity to re route the rear brake hard line away from exhaust manifold heat as well. It also saves it from damage and looks much neater:
I've still got to paint the hard line that runs across the firewall to the LH side and fit it. All it's related hardware will get painted as well. The positive battery cables have also been refitted on the firewall now although not in the photo above.
 The pressure differential warning block also get disassembled and reconditioned. Yes, I know, they can't be rebuilt....but oddly, I did it. They are simple to disassemble, pop switch and end cap off. In the recess the switch screws into are two circlips on the differential valve that limit motion. Remove them (if they bend big deal, they are only circlips, easily replaced), and slide the valve out through the big plug end. The seals inside will remain undamaged, but they are only O rings, so again, easily replaced. The valve doesn't move in normal use, so there is absolutely no seal or valve wear. Pop it out, clean everything well and reassemble.
 If you own an XJS with this valve and it's never been apart, I strongly recommend disassembling it. The one on my car was very stuck with a fair bit of corrosion on the body at the outer ends internally. I doubt it would've moved with differential pressure applied to it. It's a useless item if it's not free to move. To check it just remove the switch and use a screwdriver to try and move the valve back and forth. No movement and you know what to do:

Bonnet latches have also been dug out of hibernation along with bonnet hinges and these with some other small parts and their fasteners will get ultrasonically cleaned shortly, refinished and installed. I've found plain old bicycle brake/shifter cable is a perfect replacement for the firewall cables for the latches.
 Upper and lower front control arm bushes have also been ordered, balljoints to follow. As the body progresses up to final paint, the front suspension will come into the garage and be disassembled and cleaned, then I can bolt up the crossmember and recondition the control arms and brakes. That will allow me to start work on engine mounts etc after the body is painted and not be anywhere near fresh paint for several weeks whilst I play around with that.
 Of course the rear suspension and cradle will have to be offered up to trial fit the engine as well and that'll get recoed at some stage as well.
 So some good progress is happening and the momentum is picking up again.

Wednesday, 4 December 2013

Early summer update

 Things have been busy, and not always with the poor XJS. It's been languishing a fair bit lately due to other things requiring my attention and plain old apathy!
 It's very easy to say "just strip the paint" but anyone who has done it knows how tedious, tiring, noisy, smelly and dirty it is. A very easy job to keep putting off. I've got both sill panels looking great and everything on the shell is now in high fill ready for somfinal sanding. Sill panels are HORRIBLE things to get straight- they're down low and weird angles.

 The big repair on the driver's door is also done and that door is just about ready for some epoxy primer. it's been filled and faired, no photo of that at the moment.
 Both front guards have also been stripped and temporarily bolted to the shell to allow for fitting and some fairing of  some previous repairs and dings. I find it much easier to work on the guards when they are bolted down in position. They are such small, light panels that they move around too easily on stands, benchtops etc. Bolting them up allows you to lean on the sanding blocks properly. Once they are done, they'll be pulled off and epoxied inside and out. I'm quite proud of my plastic sheets masking everything else off! They prevent the guards contacting nice fresh paint, easily allow the fasteners to be pushed through them and keep everything dust free. I came across the idea by accident, I offered the front guard up for a trial fit with the plastics still on and it just looked right.


The boot lid is also stripped inside and out. Chemical stripper on the outside, wire wheel on the inside. Don't use chemical stripper on inside of panels, there is no way to remove it all once it gets behind the subframe.
 This is the first panel I have come across that hasn't been repaired in the past or to have dents.


 When I pulled the bootlid off my donor car, I found this on the original fuel tank. Kind of puts the whole "disgruntled union workforce" story about Brown's Lane into perspective...at least one person on the line was either enjoying their job or building the new Jaguar two door...

 And that's where we are at the moment. I'm off as soon as I post this update to fair and fill both front guards and the passenger side door. Will hopefully have both guards, door and bootlid in epoxy (and hopefully high fill also) before christmas. I haven't started stripping the bonnet yet, it's such a large panel I'm leaving it until I am ready to paint everything else to bring it into the garage and prep it. it just takes up too much space!

Small update today. I managed to get the two front guards and boot lid in epoxy primer. Have thoroughly cleaned and primed inside and out all panels, so I shouldn't have any rust issues with the front guards once they have seam sealer applied to the reinforcement seams.
The boot lid has come up really well, there is a tiny little ding in it that may just block out with primer I think.
 I also ended up with a spare front guard off the parts car and will also have an extra door eventually.

I spent an afternoon pulling engine bay parts out of the parts car.
The brake master, all fluid lines, proportioning valve etc will all get thoroughly cleaned and reconditioned before being installed. This way I'll know how much room everything needs and it won't have to come out again once the engine is in. Nothing looks nicer than nice clean, new master cylinders, boosters, brackets and lines.
Everything on the parts car looks in reasonable condition and looks to have been in service until fairly recently. It all just needs a good clean.

And I received a rear sump HQ pickup for the Holden V8. I picked up a nice used rear sump a while ago so now the engine can be swapped over to rear sump for the conversion. I intend to remove the late model front sump baffling and windage tray from the Commodore sump and fit it to the older sump. Both the sump and pickup I bought are in excellent used condition.


  The engine will get new front and rear main seals while I'm at it as well, plus I'll pop the transmission off, replace the front pump and input/converter seal plus some other light transmission tweaks.
I may as well replace seals etc now whilst it's easy.


Tuesday, 6 August 2013

Finally onto some paint.

The weather has sort of warmed up enough that I could get some paint onto a few areas.
First off I laid a couple of coats of polyester filler over the rear end, to fill any imperfections and sanding marks in the filler and sheet metal. This spray filler is great, sands easily and fills all those tiny marks that always make themselves very hard to remove:

I've also managed to spray some epoxy etch primer over the engine bay, cowl and front half of the roof. This is a very nice paint, very tough and flows well. This is the last coat before colour that the engine bay will get, I have no desire to sand the engine bay to a perfect finish, so I'll just scuff the epoxy and straight to colour. This will also give me a nice, thin, super tough paint finish.
 Also spread some seam sealer around all the engine bay seams (unlike Jaguar did originally!)


And then finally decided on a colour and sprayed the engine bay. The colour is Jaguar Azure blue. It was available as a special order 1972-78 and a few E types were painted this colour, but I haven't seen an XJS in it.

I've been working on the door repair the last few days, shaping the repair patches etc. Slow going but needs to be for such flat panels to avoid significant warpage. The actual door shell was in pretty good condition, just needing the rear corner replaced:


 Then made up an outer skin replacement. This involved folding a flange into the top of a piece of sheet metal for a nice lap joint. Jaguar seems to have coated the inside of the door skin with sound deadener before folding the skin over the door, I had to remove deadener from the rear of the existing skin behind the intrusion bar, to get the repair to lay nice and flat.
 I was lucky in that I also had a nice piece of sheet metal laying around that closely matched the gentle curve of the door skin as a starting point. Was still a fair bit of work getting it to fit nicely though!


You can see a bit of distortion in the front edge of the existing skin in this photo, it could be a real problem when it comes time to weld. I am hoping my temporary jig below will help reduce any chance of distortion by keeping the seam in line and acting as a heat sink for the welding process. I'll just go slow and do a little at a time to avoid excess heat build up.... all I can do really!

I've painted the lower door shell and back of the repair panel with epoxy primer. When it is all completed it will get another coat into the folded seam then seam sealer. That should eliminate any chance of future rust in this area.